 how-to
How to Apply Extensions for Volume: 7 Steps
Last Updated: November 5, 2026
Quick Summary
To apply extensions for volume at home, brush out tangles, then place the weft close to the root where hair is thickest and press the clips closed from center to edge. Work upward in one-inch rows, clip each piece firmly, then style the top layer to hide attachment points.
- Start with clean, dry hair and a wide-tooth comb.
- Place the weft within a half-inch of the root, where hair is thickest.
- Work upward in one-inch rows, alternating the side you start from.
- Begin with one three-piece set for medium-density hair and add a second only if needed.
- Remove a piece if clips feel tight at the root or a headache starts within an hour.
Table of Contents
- Choosing the Right Extensions for Volume
- How to Apply Extensions for Volume at Home
- How to Put In Clip-In Extensions for Thin Hair
- How to Apply Extensions for Volume on Short Hair
- How to Apply Clip-In Hair Extensions Step by Step
- Placement, Blending, and Troubleshooting Visible Clips
- Booking Your Consultation and Choosing Your Set
- Frequently Asked Questions
Choosing the Right Extensions for Volume
Choosing the right type of extension is the first step to fuller hair. This guide walks you through how to apply extensions for volume at home, step by step.
Extensions can add instant fullness, length, and texture. The right set depends on how thin your hair is, how much lift you want, and how much time you have.
- Clip-in extensions: Best for special occasions and daily wear you can remove at night.
- Tape-in extensions: Lie flat and blend well, but need a stylist for placement and removal.
- Weft extensions: Sewn or bonded onto a track, giving thicker coverage.
Watch out: Heavy sets on very fine hair can cause slipping, so start with fewer pieces and add more as needed.
How to Apply Extensions for Volume at Home
Applying extensions at home is simple once you have a plan, but volume comes from placement and weight distribution, not from adding more hair. Start with clean, dry hair and a wide-tooth comb, and work in front of a mirror with a hand mirror behind you so you can check the back of your head.
- Brush out all tangles and part your hair horizontally, about one inch above the nape. Keep each parting no wider than the weft you are placing so the clips sit flat against the scalp.
- Place the weft close to the root, where the hair is thickest, and press the clips closed from center to edge. A weft placed more than a half-inch from the root will slide and show.
- Work upward in one-inch rows, alternating the side you start from so the weight stays balanced.
- Clip or secure each piece firmly, then check for a smooth blend by running your fingers through the top layer.
- Style the top layer to hide attachment points, and finish with a light hold spray rather than a heavy serum that can weigh fine hair down.
How much hair to use: A common pattern is to start with one three-piece set for medium-density hair and add a second set only if the sides look thin.
Watch out: Clips that feel tight at the root, or a headache within the first hour, mean the set is too heavy for your density. Remove a piece and redistribute the weight before you continue.
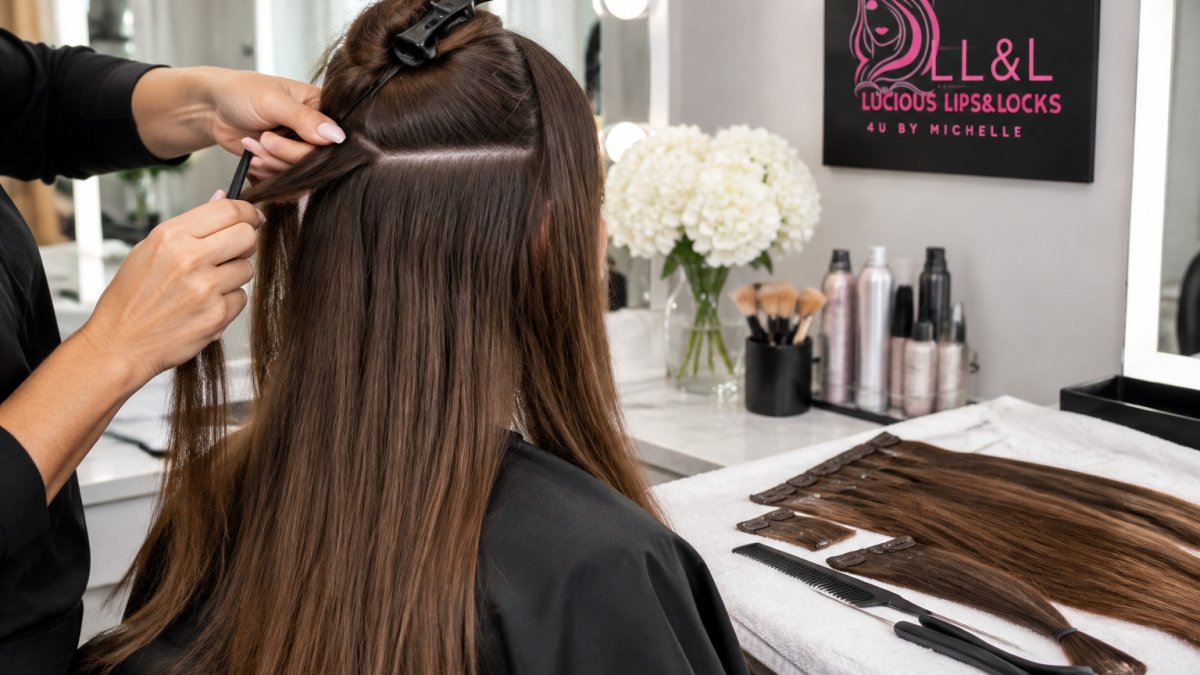
The steps below summarise how to place extensions at home and what to watch for.
| Step | What to do | Time or frequency |
|---|---|---|
| Brush and part | Brush out tangles and part horizontally, about one inch above the nape | Before starting |
| Place weft | Set the weft close to the root and press clips from center to edge | Close to the root, under a half-inch |
| Work upward | Work in one-inch rows, alternating the starting side | One-inch rows |
| Clip securely | Clip each piece firmly and run fingers through the top layer | Per piece |
| Style top layer | Hide attachment points and finish with light hold spray | Final step |
How to Put In Clip-In Extensions for Thin Hair
Thin hair needs a light touch. Use fewer, lighter pieces and place them at the crown, where volume shows most.
Start with the middle piece, then add the sides so the top layer covers the clips.
How to Apply Extensions for Volume on Short Hair
Short hair can still take extensions, but placement matters more. Keep the pieces short and close to the root, so they do not hang below your natural length.
How to Apply Clip-In Hair Extensions Step by Step
Follow these steps for a secure, natural result:
- Section your hair. Create a horizontal parting above the ear.
- Attach the first weft. Clip it close to the root, at the crown.
- Add the side pieces. Work outward and keep each clip flat against the scalp.
- Check the blend. Gently run your fingers through the top layer.
- Style and finish. Curl or straighten to match your natural hair.
Shop our weft-style extensions if you want a set made for this method.
Placement, Blending, and Troubleshooting Visible Clips
Most visible clips come from placing the piece too low or too far from the root. Move the clip higher and cover it with your natural hair, but also check the placement map for your hairstyle, because the right position changes with the part and the cut.
Placement maps by hairstyle:
- Middle part: Place wefts one inch back from the part on each side, angling the clips away from the part line so the teeth do not peek through.
- Side part: Put the heaviest weft on the side with more hair, about two inches behind the part, and use a lighter weft on the shorter side to avoid a lopsided crown.
- Ponytail: Anchor a single weft at the occipital bone, then wrap the ponytail base with a small weft or a bun wrap so the attachment disappears into the tie.
- Short layers: Keep wefts above the shortest layer and trim the extension ends to match, otherwise the ends will hang below the cut and look obvious.
- Sparse areas at the temples or crown: Use a narrower weft cut to size rather than folding a wide weft, which creates bulk and a visible ridge.
Troubleshooting common failures:
- Visible clips: Move the clip a half-inch higher and brush the natural hair over it with a fine-tooth comb, not a brush that can catch the teeth.
- Bulky roots: Use a lighter weft, brush the roots upward, and avoid placing two wefts in the same row.
- Slipping: Add a clip near the nape to anchor the set, and check that the clips are closed flat rather than pinching the hair.
- Uneven volume: Re-check each side in the mirror and add or remove a piece rather than shifting the whole set.
Removal, maintenance, and reapplication: Remove clip-ins at night by opening each clip from the edge, not by pulling the weft. Wash reusable extensions every 10 to 15 wears with a sulfate-free shampoo, air-dry them flat, and store them in a hanger or a silk bag. Tape-in extensions should be removed and reapplied by a stylist every six to eight weeks, and the tape should be replaced each time rather than reused.
Our tape-in and clip-style set is a good match if you are working with thin hair.
Booking Your Consultation and Choosing Your Set
If you are unsure which set fits your hair, browse our full luxury hair extension range to compare options. Our guide on choosing extensions for weddings and our guide on choosing the right hair extensions for you can help you decide before you buy.
For current pricing and availability, visit our website or contact the Luscious Lips & Locks 4U team for a quote.
Frequently Asked Questions
How do you add hair extensions for volume?
Start with hair that is clean, dry, and detangled. Section the hair horizontally, starting at the nape, and place each clip-in weft as close to the root as possible, positioned at the crown or where you want lift. Clip the weft in from the inside, then brush the top layer over it so the attachment points are hidden. Work upward in layers, and check the blend from several angles in a mirror before styling. Start with fewer pieces than you think you need, since adding more is easy and removing too many wefts after a full application is not.
Can hair extensions make thin hair look thicker?
Thin or fine hair often needs fewer, lighter wefts placed in the crown and mid-section rather than a full head of extensions, which can look bulky. Volumizing styling, such as backcombing the crown lightly before clipping, can help the extension sit flat against the scalp and reduce visible lines.
Can you use extensions for volume on short hair?
Yes, but short hair has less natural length to cover the attachment points, so placement matters more. Choose shorter, lighter clip-in wefts and position them just above the natural hair line at the crown and sides, so the lower edge of the weft is hidden under your existing hair. Avoid placing wefts too low, where they can show through. Trim or style the extension ends after installation so the lengths blend with your cut.
How do you put clip-in extensions in thin hair?
Brush your hair to remove tangles, then section it horizontally. Clip each weft to the sectioned hair close to the root, starting with the crown and working down the sides. Use the fewest wefts that achieve your target fullness, typically a lighter set for fine hair, and keep the clips secure without pulling on the scalp. Gently blend the top layer of your natural hair over the clips and style with a light volumizing product. Check for visible clips or slipping before you leave the mirror, and reposition any weft that sits too low or too far from the root.