 how-to
How to Stop Hair Extensions Tangling: A 2026 Guide
Table of Contents
- Why Hair Extensions Tangle and Mat
- How to Brush Hair Extensions Without Causing Breakage
- How to Wash Hair Extensions and Prevent Tangling
- How to Sleep With Hair Extensions to Avoid Matting
- How to Detangle Matted Hair Extensions
- Product Selection and Hair Care Routine
- Common Mistakes That Cause Tangling
- Frequently Asked Questions
Last Updated: October 7, 2026
Why Hair Extensions Tangle and Mat
Hair extensions tangle for several reasons, and understanding the root causes helps you stop hair extensions tangling before matting starts.
Hair quality matters significantly. According to Perfect Locks industry analysis, lower-quality hair sources are inherently more prone to tangling regardless of your care routine.
Static electricity also plays a role: dry environments and friction-generating fabrics amplify static, causing hair to repel and tangle.
How to Brush Hair Extensions Without Causing Breakage
Proper brushing technique is your first defense against tangling. Most people brush too aggressively or use the wrong tools, creating breakage that leads to matting. The goal is gentle detangling without pulling or stretching.
Choosing the Right Tools
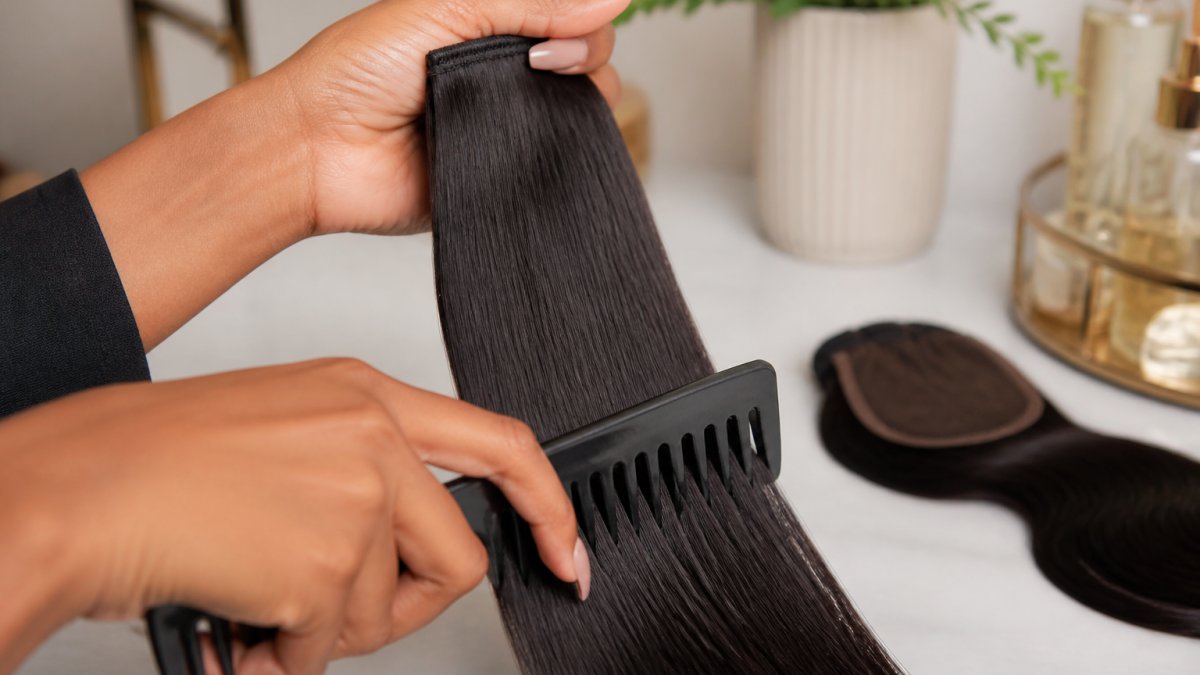
Start with the right tools. A wide-tooth comb gently separates strands without snagging, and a boar bristle brush with flexible bristles glides through hair smoothly.
Look for combs with rounded teeth that won't puncture the cuticle. Natural boar bristles are gentler than synthetic because they distribute natural oils, reducing friction.
Step-by-Step Brushing Technique
Follow this sequence every time you brush to minimize breakage and tangling:
-
Start at the ends. Hold the hair near the wefts or bonds to reduce tension on the roots. Comb the bottom 2-3 inches first, working out small tangles before moving upward.
-
Work in sections. Divide extensions into 4-6 sections and brush each completely before moving on, so you don't miss tangles that worsen over time.
-
Use light pressure. Let the comb do the work; use multiple gentle passes instead of one forceful stroke.
-
Brush before washing. Always detangle dry hair before shampooing, since wet hair is more fragile and water sets existing tangles permanently.
-
Avoid the roots initially. Don't brush near the bonds or tape-in attachments until the ends are fully detangled, or you'll strain and loosen them.
How to Wash Hair Extensions and Prevent Tangling
Washing is where many people make critical mistakes: the wrong products, too much agitation, and improper rinsing all contribute to matting and shedding.
Pre-Wash Preparation
Before you wet your hair, brush through your extensions thoroughly with your wide-tooth comb to remove all tangles. This step is non-negotiable: once water hits matted hair, those tangles become much harder to remove. Then gather your hair into a loose braid or low ponytail, securing it gently since tight braids create tension on the bonds and roots.
The Washing Process
Use only sulfate-free shampoo and conditioner, since sulfates strip moisture and make hair dry and tangle-prone. Lather the shampoo in your hands first, then apply gently to the scalp and roots, avoiding scrubbing the extensions themselves. Rinse with lukewarm water poured downward along the shaft, never scrubbing or twisting. Apply a leave-in conditioner or deep conditioning treatment to the mid-lengths and ends for 5-10 minutes, then rinse with cool water to close the cuticle, squeeze out excess water without wringing, and pat dry with a microfiber towel or soft t-shirt.
How to Sleep With Hair Extensions to Avoid Matting
Sleep is where most tangling happens: eight hours of friction against your pillow, plus tossing and turning, creates perfect conditions for matting, especially at the roots and attachment points.
The simplest solution is to sleep in a loose braid, secured with a soft elastic, so strands don't rub against each other or your pillow. The braid should be loose enough to fit a finger through it, since tight braids create tension on the bonds.
How to Detangle Matted Hair Extensions
Most guides cover prevention and stop there. If your extensions are already matted, you need a rescue protocol, not a lecture. Work through it in order and do not skip steps.
Step 1: Triage the Mat Before You Touch It
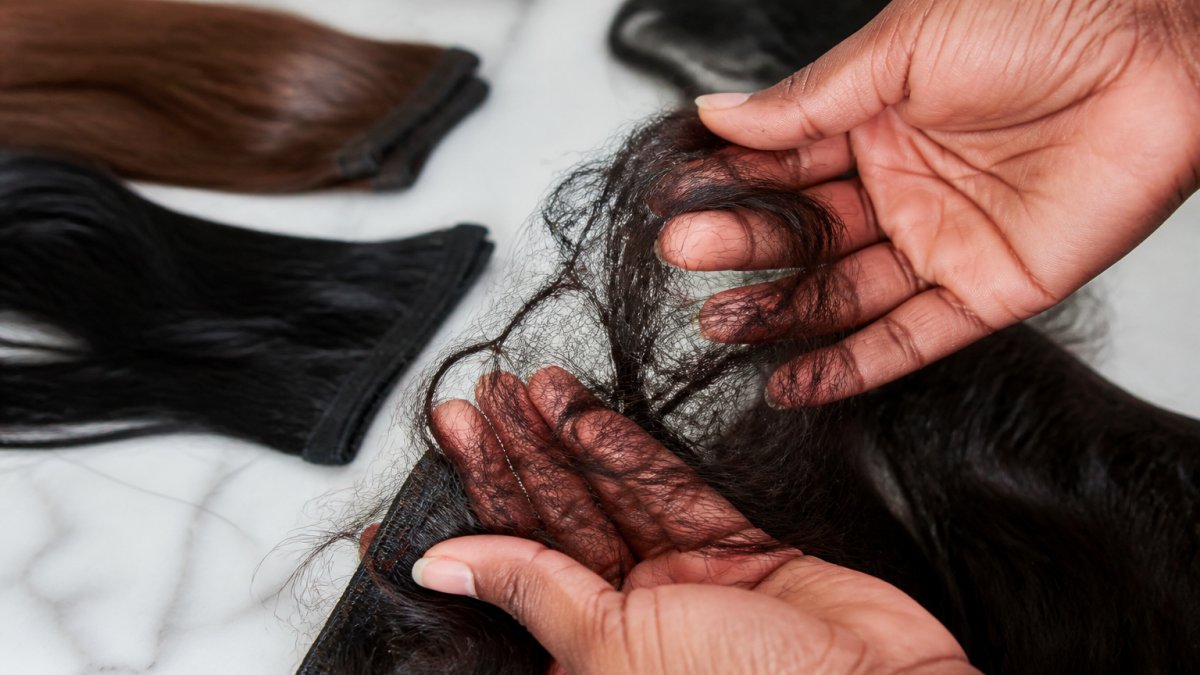
Not all mats are equal. Before you pick up a comb, classify what you are dealing with:
- Surface tangle. Strands are crossed but you can see through the mat and separate it with your fingers. Fixable at home in 15-30 minutes.
- Dense mat. You cannot see through it, it feels felted, and finger separation does not move it. Plan on 45-90 minutes and expect to lose some strands.
- Root-locked mat at the attachment. The mat is anchored at tape, bond, or weft. Do not pull. This is the one case where a professional removal and reinstall is usually cheaper than the damage you will cause.
If the mat is root-locked or the hair is fused solid, stop and book a stylist. Everything below assumes a surface or dense mat on the length, not the attachment point.
Step 2: Set Up the Right Tools
Tool choice changes the outcome more than technique:
- Wide-tooth comb (teeth roughly 1/4 inch apart). Your primary tool for length mats.
- Loop brush or detangling brush with flexible, staggered bristles. Better than a wide-tooth comb for tape-in and clip-in wefts because the bristles flex around the adhesive strip instead of levering against it.
- Boar bristle brush. For finishing and distributing oil after the mat is out, not for the mat itself.
Avoid fine-tooth combs, paddle brushes, and ball-tipped bristles that snag on tape or bonds.
Step 3: Lubricate, Then Wait
Wet the mat with the diluted leave-in until damp, not soaked, working it in from the outside edges inward. Let it sit 5-10 minutes to lower friction between strands so they slide instead of snapping. Do not use oil-based products on tape-in or bonded extensions, since they can soften the adhesive.
Step 4: Work Outside-In, Never Center-Out
This is the step people get wrong: pulling a comb through the center of a mat tightens it into a knot. Instead:
- Hold the mat between both hands and gently pull the outer edges apart with your fingers, a few strands at a time. Think of peeling an onion, not combing a ponytail.
- Once the outer layer loosens, isolate a single small section at the edge with the rat-tail comb.
- Comb that section from its tip toward the mat, not outward, using short strokes and light pressure.
- Re-wet and re-lubricate as it dries, since dry hair re-tangles instantly.
- Clip cleared sections aside and move to the next edge.
Expect to repeat this cycle many times; a dense mat can take 60-90 minutes, still faster than growing out a broken section.
Step 5: When to Stop
Stop and call a professional if any of these are true:
- The mat is anchored at a tape, bond, or weft and will not release with finger separation.
- You are hearing strands snap or seeing broken pieces in the comb.
- The mat has been in place for weeks and feels fused rather than crossed.
A stylist can often remove and reinstall the affected wefts in under an hour, preserving the hair you would otherwise destroy.
Step 6: Reset the Hair After Detangling
Once the mat is out, the hair is stressed and the cuticle is roughed up. Do not just brush it and move on:
- Shampoo gently with a sulfate-free, extension-safe cleanser.
- Apply a deep conditioning mask to the mid-lengths and ends for 10-15 minutes.
- Rinse with cool water to help close the cuticle.
- Apply a water-soluble leave-in and a few drops of lightweight oil to the ends.
- Air-dry or use the lowest heat setting. Do not brush while wet.
Preventing the Next Mat
After a rescue, the hair is more tangle-prone for a week or two. Braid loosely at night, sleep on silk or satin, keep oils off the attachment points, and brush from the ends up every morning before styling. If mats keep forming in the same spot, the cause is usually a loosening attachment, a rough pillowcase, or product buildup.
Product Selection and Hair Care Routine
The products you use determine whether your extensions stay silky or turn into a mat. Most guides stop at "use sulfate-free shampoo," but that is the floor, not the ceiling. What matters is which ingredients coat the cuticle, which strip it, and which leave residue that glues strands together over time.
Read the Ingredient Label, Not the Front of the Bottle
Four ingredient families drive most extension tangling:
- Sulfates (sodium lauryl sulfate, sodium laureth sulfate). These anionic surfactants lift the cuticle and strip the oils and silicone coating that give extensions their slip, so strands grip each other. Sulfate-free formulas use gentler surfactants such as sodium cocoyl isethionate or cocamidopropyl betaine.
- Non-water-soluble silicones (dimethicone, amodimethicone, cyclopentasiloxane). These give instant smoothness but build up on the cuticle, becoming tacky and creating friction points that tangle. Water-soluble silicones (often listed with PEG- or a "-cone" paired with a PEG modifier) rinse clean and are safer for extensions.
- Drying alcohols (denatured alcohol, SD alcohol, isopropyl alcohol). Fine in an occasional finishing spray, damaging when high on the ingredient list of a daily leave-in, since they evaporate moisture and leave the cuticle rough.
A simple rule: if the first five ingredients include a sulfate or a non-PEG silicone, it is not an extension product. If the first five include denatured alcohol, use it sparingly.
Match the Routine to Your Attachment Type
Attachment method changes what your hair can tolerate:
- Tape-in and keratin-bond extensions. The adhesive is the weak point, so oil-based products, heavy serums, and oil-based detanglers can soften it over time. Keep oils on the mid-lengths and ends only, never at the root, and choose a water-based leave-in.
- Clip-in extensions. Removed nightly, so buildup matters less and heat protection matters more. A lightweight thermal protectant and water-soluble leave-in are enough; you can be more generous with oil on the ends since you wash the wefts separately.
- Sew-in and wefted extensions. The scalp and braided foundation trap oil and product. Use a scalp-focused sulfate-free cleanser and keep conditioner off the braided base to avoid slippage and odor.
A Workable Weekly Routine
| Product Type | Purpose | How Often |
|---|---|---|
| Sulfate-free, extension-safe shampoo | Gentle cleansing without stripping cuticle oils | 1-2 times weekly |
| Water-soluble leave-in conditioner | Ongoing moisture and slip between washes | After each wash, or daily on dry ends |
| Lightweight hair oil (argan, jojoba, or squalane) | Cuticle smoothing and static control | 2-3 times weekly, mid-lengths to ends only |
| Thermal protectant | Heat damage prevention | Before any heat styling |
| Water-based detangling spray | Easier brushing and mat removal | As needed |
| Sulfate-free clarifying shampoo | Removes silicone and product buildup | Once monthly |
Heat, Humidity, and Hard Water
Two environmental factors most guides ignore:
- Hard water. Calcium and magnesium ions bind to the cuticle and leave a dull, rough film that increases friction. If your water leaves spots on glass, it is leaving minerals on your extensions. A monthly chelating or clarifying shampoo, or a showerhead filter, reduces the film.
- Humidity and heat. High humidity swells the cuticle and raises friction, which is why extensions tangle more in summer; lightweight silicone-free serums and a loose braid help. Heat styling above roughly 300°F degrades the cuticle and, on bonded extensions, the adhesive itself, so keep tools on the lowest effective setting and always use a thermal protectant.
Common Mistakes That Cause Tangling
Understanding what NOT to do is just as important as knowing what to do.
Using regular shampoo strips moisture and creates buildup. Extensions need sulfate-free, extension-specific products.
Brushing wet hair causes breakage because wet hair loses strength.
Tight styling and tension at the roots strains the bonds and creates breakage.
Skipping deep conditioning leaves hair dry and prone to tangling.
To stop hair extensions tangling and keep them silky requires consistent, gentle care. Start with the right tools, use extension-safe products, protect your hair at night, and brush gently.
Frequently Asked Questions
Why do my hair extensions always get tangled?
Hair extensions tangle due to friction between strands, moisture imbalance, and product buildup. The hair cuticle can catch and mat when extensions rub against clothing, pillows, or each other during sleep. Poor-quality hair sources are inherently more prone to tangling regardless of care routine. Using sulfate-free products, sleeping in a loose braid or silk bonnet, and regular gentle brushing significantly reduce tangling.
How often should I brush my hair extensions?
Brush extensions daily, ideally twice: once in the morning and once before bed. Always brush before washing to remove existing tangles. Use a wide-tooth comb or brush with flexible bristles, starting from the ends and working upward to prevent breakage. Gentle, frequent brushing prevents matting better than occasional aggressive detangling.
How can I fix matted hair extensions?
Start by assessing the severity of matting. For light matting, use a detangling spray and wide-tooth comb, working gently from ends upward. For severe matting, apply a leave-in conditioner or oil treatment to add slip, then work through tangles slowly with a boar bristle brush. Never pull or force the comb through matted sections. If matting persists after 15-20 minutes of gentle work, the extensions may require professional restoration.
What products should I use to prevent tangling?
Use only sulfate-free shampoo and conditioner formulated for extensions. Leave-in conditioner and detangling sprays reduce friction and matting. Oil treatments applied to mid-lengths and ends improve moisture balance and protect the hair cuticle. Thermal protectant products are essential if you heat style, keeping styling tools below 302°F to prevent damage that leads to tangling.