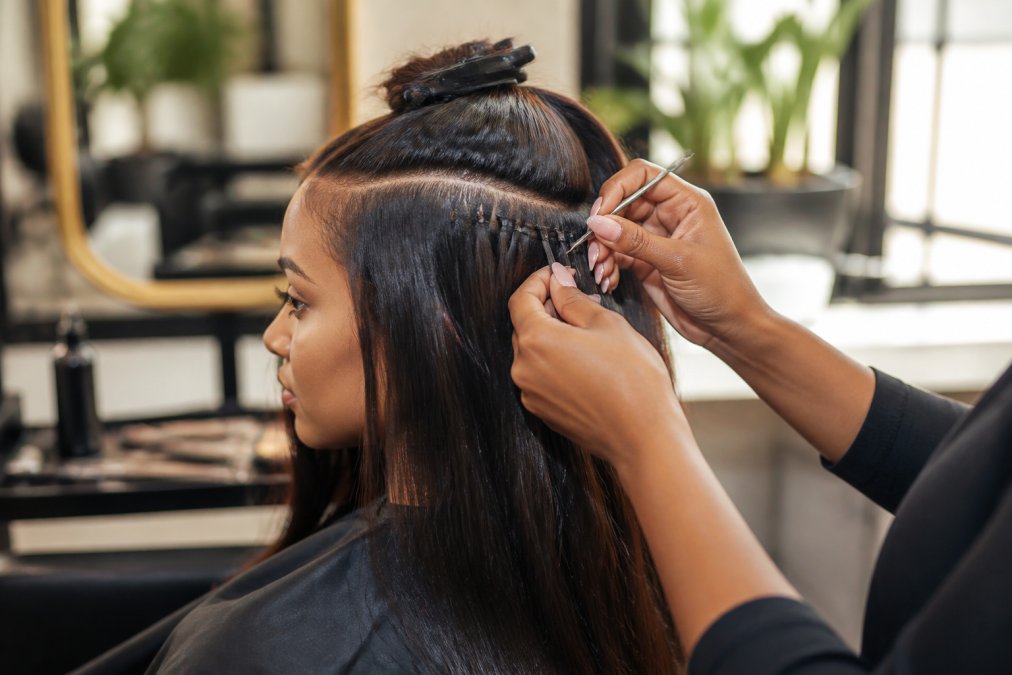
 how-to
How to Make Extensions Look Natural: 2026 Styling Guide
Table of Contents
- Why Extensions Look Fake (and How to Fix It)
- Prep Work: Washing, Toning, and Color Matching
- How to Blend Hair Extensions With Short Hair
- How to Cut Hair Extensions for Layers
- How to Style Hair Extensions With Natural Hair
- Diagonal Placement and Root Teasing for Seamless Volume
- Troubleshooting Visible Tracks and Post-Installation Care
- Conclusion
- Frequently Asked Questions
Last Updated: September 18, 2026
Why Extensions Look Fake (and How to Fix It)
Most extensions look fake because the blending stops at the clip. How to make extensions look natural lives in placement, prep, and the small habits you repeat every morning.
Prep Work: Washing, Toning, and Color Matching
Prep is where most installs are won or lost. Skipping it shows up later as brassiness, tangles, and tracks that refuse to hide.
Color matching checklist:
- Compare the weft to your mid-lengths in daylight
- Check for warmth or ash undertones
- Tone brassy pieces with a purple or blue shampoo
- Test one small section before committing
How to Blend Hair Extensions With Short Hair
Blending extensions with short hair comes down to layering and placement, not length. Keep the extensions inside your natural perimeter: clip them lower on the head, close to the scalp, so your own hair covers the top edge.
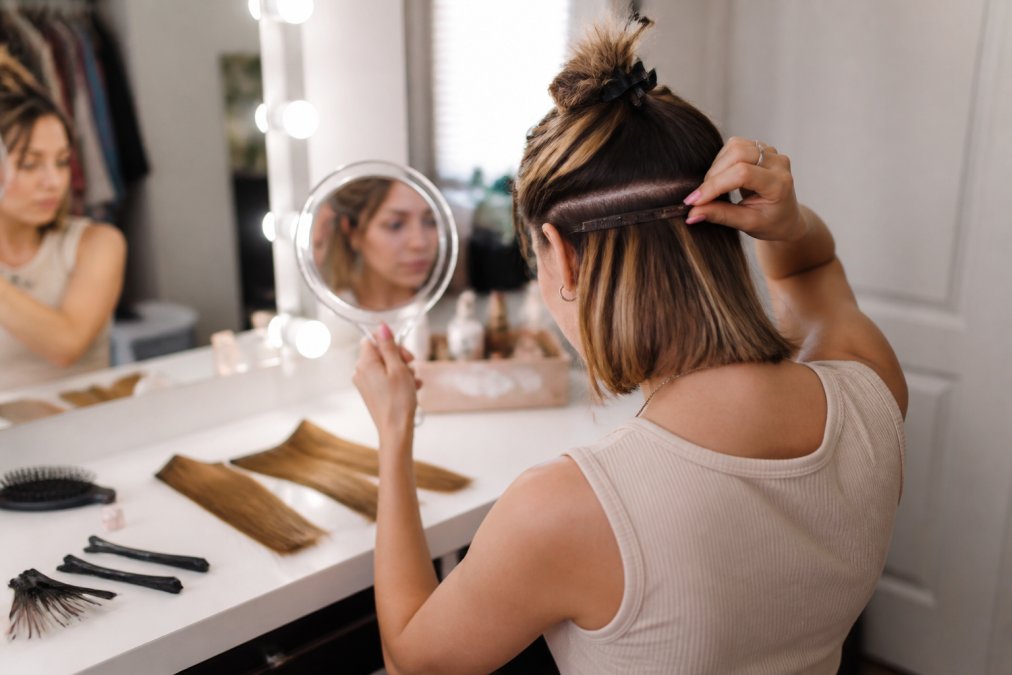
Here is the approach that works:
- Section your hair into a top, middle, and bottom layer
- Clip the shortest wefts at the bottom, near the nape
- Add longer wefts in the middle layer for length
- Leave the top layer free of extensions so it falls over the tracks
- Finger-comb the layers together to soften the line
How to Cut Hair Extensions for Layers
Cutting extensions for layers takes sharp shears and a light hand. You are not shaping a whole head of hair, you are softening the ends so they merge with your own cut.
What you'll need:
- Sharp hair shears
- A wide-tooth comb
- Sectioning clips
- A spray bottle with water
How to Style Hair Extensions With Natural Hair
Styling extensions with your natural hair means treating both as one head of hair. The goal is matching texture and movement, not just color. Most guides stop at loose waves because that is the easiest pattern to fake. If your hair is curly, coily, or kinky, the rules change.
Match the pattern before you match the curl
A weft that curls beautifully on its own can still read as fake if its pattern does not match yours. Pattern is the shape of the wave, the size of the coil, and how tightly it springs back, two heads of hair can be the same color and length and still look wrong together.
- Steam-setting the weft on flexi rods or perm rods sized to your natural coil, then letting it cool completely before removing
- Wet-setting with a leave-in and gel so the weft dries into your pattern instead of against it
- Blending two wefts of different patterns in alternating rows so the eye reads an average rather than a mismatch
Styling by texture
Wavy hair (type 2). Curl your natural hair first, then the extensions, using the same barrel size on both. Wrap away from your face, let each curl cool before you touch it, and finger-comb at the end, a brush pulls the waves out.
The blending rules that hold across every texture
- Curl or coil your natural hair first. Extensions follow your pattern, not the other way around.
- Work in the same direction. Consistent wrap direction keeps the pattern unified.
- Let each section cool or dry fully before touching it. Warm hair stretches and loses its set.
- Finger-comb, don't brush. A brush flattens coils and separates wefts from your hair.
- Check the blend in daylight, not bathroom light. Overhead light hides pattern mismatches that daylight exposes.
For fine hair, mist volumizing powder at the roots before styling. It gives the wefts something to grip and lifts the crown so tracks stay hidden.
Heat and texture trade-offs
Heat is your main tool for wavy and straight blends, but it is a poor fit for coils. Direct heat on a coily weft can loosen the pattern permanently, and once a coil is relaxed it will not spring back. For type 3 and type 4 hair, lean on wet-setting, steam, and rod sets instead of flat irons and curling wands.
Diagonal Placement and Root Teasing for Seamless Volume
Diagonal placement is the single most effective trick for hiding tracks. Instead of clipping wefts in a straight line, angle them.
How to place wefts on a diagonal:
- Part your hair at a slight angle, not straight across
- Clip the weft along that angled part
- Keep each row offset from the one above it
- Tease the roots of your natural hair over the track
- Smooth the top layer down to cover the seam
Troubleshooting Visible Tracks and Post-Installation Care
Visible tracks almost always trace back to one of three causes: too much hair in one spot, a color mismatch, or roots that sit flat. But the moment a track actually shows is rarely at the mirror. It is in wind, in humidity, or three hours into a workday when a clip slips. This section covers both the fix and the emergency save.
The diagnostic table
| Problem | Likely Cause | Fix |
|---|---|---|
| Track shows through | Weft too wide or too high | Move it lower, split into thinner rows |
| Root looks flat | No teasing or lift | Backcomb the base, add volumizing powder |
| Color seam | Warm or brassy tone | Tone the weft cooler than your hair |
| Ends look stiff | Blunt cut or too much product | Point-cut ends, use less product |
| Tangling at night | Hair loose on the pillow | Braid loosely before bed |
| Track slips mid-day | Clip lost tension or hair too smooth | Reset the clip, add a light tease under it |
| Blend separates in humidity | Natural hair and weft absorb moisture differently | Smooth with a light oil, re-pin the top layer |
Emergency fixes when a track is exposed in public
You are at lunch, the wind picks up, and a row of clips is suddenly visible. Here is what to do in order:
- Do not panic-touch it. Running your fingers over the track draws attention and loosens the clip further.
- Find a restroom or a reflective surface. You need two hands and a mirror.
- Lift the natural hair above the track, not the track itself. Slide your fingers under your own hair and pull it down over the weft.
- Re-seat the clip. Open it, push it up toward the scalp, and snap it closed against a teased base. If the clip has lost tension, move the weft one row lower where the hair is denser.
- Cross-pin if you have a bobby pin. A single pin placed perpendicular to the clip holds it through wind and movement.
- Smooth the top layer with a drop of oil or a light serum on your fingertips, then press down. This re-flattens the cuticle so the seam disappears.
Wind, humidity, and weather
Humidity is the quiet enemy of a natural blend. Your natural hair and the weft absorb moisture at different rates, so one swells and the other does not, leaving a visible line where the textures meet.
- Before you go out, smooth a light oil or anti-humidity serum over the top layer only. Do not apply it to the wefts, which can make them separate from your hair.
- In wind, keep the top layer pinned or tucked behind the ear on the side the wind hits. Loose top layers lift and expose tracks first.
- In dry heat, static makes fine hair cling to the wefts and expose the seam. A dryer sheet passed lightly over the top layer neutralizes it.
Post-installation care that keeps the blend fresh
Brush from the ends up, never from the root down. Sleep with your hair in a loose braid or a silk wrap. Wash gently and let the wefts air dry. Human hair holds a style longer than synthetic, but it still needs care, heat styling is fine in moderation with a heat protectant and a moving iron.
Conclusion
Getting extensions to look natural is a skill, not a lucky purchase. The right hair helps, but placement, teasing, and daily care do the real work.
Frequently Asked Questions
How do you hide the tracks of hair extensions?
Place wefts in diagonal rows rather than straight lines so the tracks follow your head's curve and hide under your natural hair. Tease the roots just above each track with a fine-tooth comb or volumizing powder to lift your own hair over the seam. Finger-comb the top layer into place, then finish with loose waves, which scatter light and soften any visible edges. Check the back of your head with a hand mirror before leaving.
Can hair extensions look natural on fine or short hair?
Yes, with the right approach. Choose clip-ins or wefts that match your hair density rather than going thicker, and cut the extensions to blend into your natural length. Diagonal placement keeps tracks from showing through thin areas. Root teasing and volumizing powder add lift so your natural hair covers the wefts. Loose waves or a tousled texture blend shorter layers into longer extensions more easily than a sleek, flat style.
How to cut hair extensions to make them look natural?
Always cut extensions while they are installed so the layers follow your natural hairline. Point-cut the ends at a downward angle to avoid blunt, choppy lines, and slide-cut along the length to soften bulk. Blend the shortest extension layer into your natural ends first, then work downward. For a face-framing effect, angle the front pieces toward your jaw. Sharp shears matter: dull blades crush the cuticle and cause frizz.
Do hair extensions blend better with straight or wavy hair?
Wavy or loosely curled hair blends more easily because texture hides track seams and softens the transition between your natural hair and the extensions. Straight hair shows every edge, so it demands precise color matching, careful sectioning, and a smooth cut. If your natural hair is straight, add a slight bend with a large-barrel curling iron through both your hair and the extensions so the textures match.